The author of this tutorial is T. Skaarup.
This tutorial was created using the AKVIS Sketch plug-in with the Adobe PhotoShop photo editor.
Motion Pictures, TV Commercials, You-Tube Videos, Music Videos, Stage Plays, and other productions that require extensive planning often use "Storyboards". Storyboards are similar to very basic "comic books" of the action with a few important differences.
Storyboards:
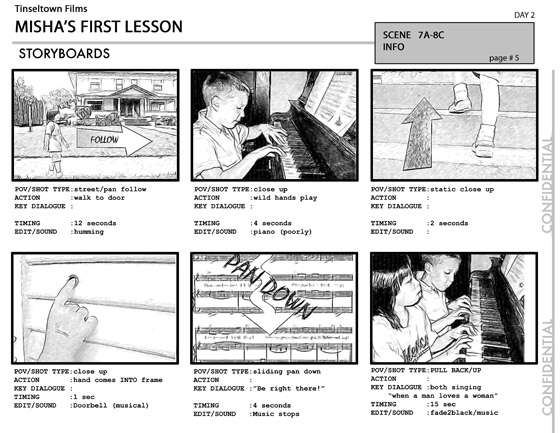
- Take into account the POV (Point-of-View) of the Camera or Audience. The location and motion of the camera is represented. This helps the Cinematographer map out the course of the filming. It also helps determine if a crane, rail, hand-truck, or gyro-stabilizer will be needed.
- Take into account the necessary motion of the Actors or Props. This helps the Director tell the story without words. Storyboards can be very a powerful tool when used correctly.
- State the dialogue that needs to spoken during the Scene. Helps determine what is essential for the story and prevents mistakes such as making the actors speak dialogue while running, climbing, dancing, etc.
- Are black-and-white. Color is only used when an item in the scene absolutely requires (for the story) to have a color. When the color is not stated it gives the Set Designers, Costumer Designers, Prop Department and others a greater amount of freedom. When a color is given in the Storyboard then that color is essential to the story.
- Are Low-Resolution. The images should clearly convey the action in the scene. But the Storyboard image should not overpower the story itself. Clear and Simple images are the best.

- Step 1. Plan out the necessary locations, scenes, motion and dialogue of your story. Once you have determined the story you want to tell try to reduce it into still images and then consider the motion. Try to put the story into a linear time-frame as it appears to the audience. Using a blank Storyboard page to scribble on can be helpful. You’ll find that you will change how you tell your story when you use a digital camera to walk through the major scenes by taking pictures. Here are some images (shown in the order they were taken) of two friends who want to get together after school to play piano.

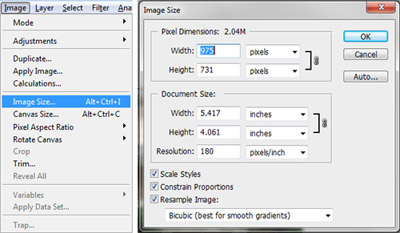
- Step 2. Import your individual images into Adobe Photoshop. Now compress the images to a small size (about 20% the original size), in this case, about 975 pixels wide (Image -> Image Size). Compression is done to purposefully lose detail that would distract from the essential purpose of the scene.
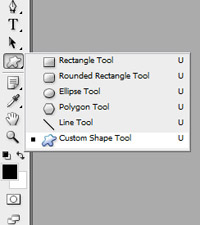
- Step 3. Create a new layer and add annotation arrows and text if necessary. Arrows can be found in the Custom Shape Tool. Open the Custom Shape Tool. The Tool menu bar will show the currently selected shape. Click on the little drop menu which appears next to the Shape representation . Choose one of these arrows. Set the foreground color to a neutral gray. Draw an arrow using the Custom Shape Tool. Make the tip of the arrow slightly smaller and asymmetric using the Edit -> Transform -> Distort.
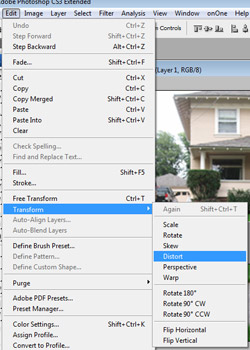
- Step 4. Set the foreground color to black. On this arrow use the Text tool to write the word "follow" in a hand script font such as Mistral. Merge the top two layers so that the arrow and text are on the same layer.
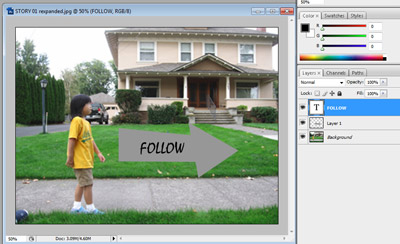
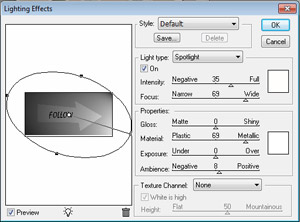
- Step 5. Apply a light effect to this layer by using Filter -> Render -> Lighting Effects. Set the foreground color to black. Now apply an outline of the arrow by using a outline stroke of 3 pixels Edit -> Stroke. Lighting effects give the arrow a sense of hand-drawn character and distinguish them from background images.
Flatten the image.
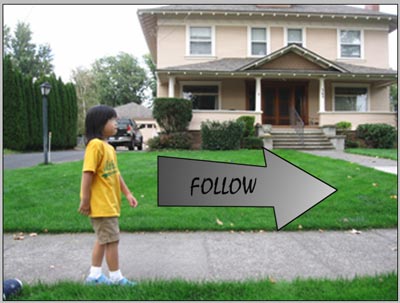
- Step 6. Use AKVIS Sketch to convert it to a black-and-white sketch (Filter -> AKVIS -> Sketch). Use the following settings: Use similar steps to annotate and convert the remaining images. Save these final JPEG images under a unique name for easy retrieval.
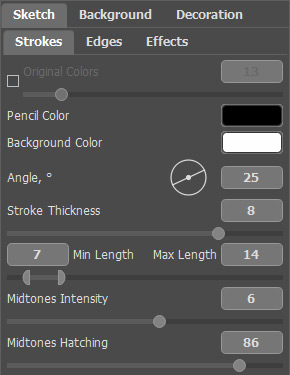
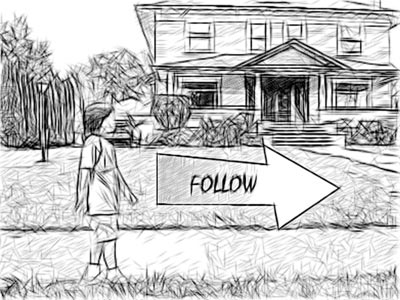
- Step 7. Open the AKVIS Storyboard Template in Adobe Photoshop. Save it under a new name so that modifications do not alter the original template. The placeholders for the sketch in the Storyboard Template are 975 pixels wide by 650 pixels high.
You can use the Rectangular Marquee Tool with a Fixed Size Style to select the exact size of the Template window. Open one of the final sketches, copy a selection the same size of the Template window to the clipboard, then return to the template and paste the image into it’s own layer. Move it to the bottom of the layers list.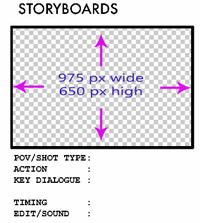
Copy each of the sketches as a separate new layer on the Template. Keep the sketch layers at the bottom of the Layers palette.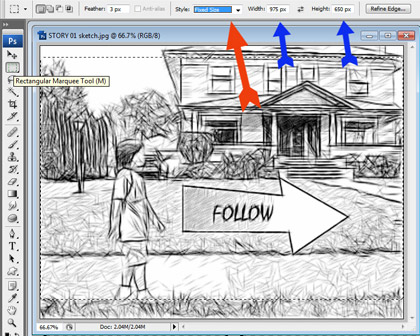
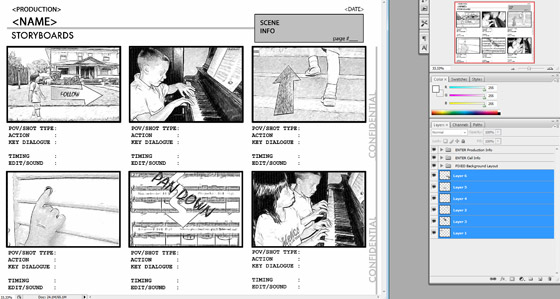
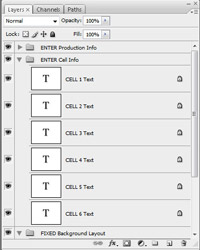
- Step 8. Once the sketch images have been placed, fill in all necessary information to complete the scene. Expand the ENTER Production Info and ENTER Cell Info and double-click on the text icon to edit the scene information.
