The retouching tools in Adobe Photoshop are: Clone Stamp, Pattern Stamp, Healing Brush, Patch and Color Replacement.
These tools repair damaged images, apply repeated patterns, or replace colors in an image.
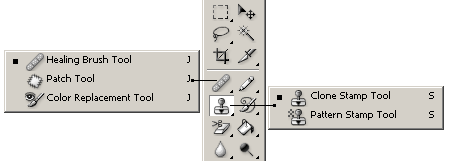
The following illustration shows the arrangement of these tools in the toolbar.
 If two or more tools occupy the same cell (the icon for the tool last used is always shown), in order to choose another tool, right-click the mouse on the arrow next to the icon and and choose another tool from the menu that appears. This menu will also appear if you click on the icon and press it for some time.
The Clone Stamp tool and Healing Brush clone (copy) pixels from one part of an image to another, to another layer or even to another image. The difference between the Healing Brush and the Clone Stamp tool is, the Healing Brush in Photoshop takes into account the texture, illumination and shadows of the processed image. As a result, the fragment processed by the Healing Brush blends more easily into the rest of the image.
To clone an area with the Clone Stamp or Healing Brush, follow these steps:
This tool can be used in one of two ways:
Define the place where the clone will be applied, then drag the tool to the source point.
Follow these steps:
Follow these steps:
To use this tool, follow these steps:
The Color Replacement tool replaces one color in an image with another. This tool can be used, for example, to repair the "red eye" effect.
Follow these steps to use the tool:
These tools repair damaged images, apply repeated patterns, or replace colors in an image.
The following illustration shows the arrangement of these tools in the toolbar.
The Clone Stamp tool and Healing Brush clone (copy) pixels from one part of an image to another, to another layer or even to another image. The difference between the Healing Brush and the Clone Stamp tool is, the Healing Brush in Photoshop takes into account the texture, illumination and shadows of the processed image. As a result, the fragment processed by the Healing Brush blends more easily into the rest of the image.
To clone an area with the Clone Stamp or Healing Brush, follow these steps:
- Step 1. Choose the tool from the Toolbar.
- Step 2. Set the parameters for the tool in the Options panel: size, blending mode, the amount of opacity and others.
- Step 3. Check Use All Layers, if you need to work with several layers at once.
- Step 4. Check Aligned to create one clone selected from the area around a starting point. The mouse button can be released and new fragments selected. Also, the mode and size of the tool can be changed. If Align is unchecked, then each application of the tool will create a clone from the same starting point.
- Step 5. Set a starting point. Do this by holding ALT, and then left-clicking on the point from which the clone will be taken.
- Step 6. Move the cursor to the location where you want to copy the fragment.
- Step 7. Press the left mouse button and the clone will be applied. If the Healing Brush is used, then the cloned fragments, texture, luminance, and shadows, will be processed in relation to the pixels of the background image.
This tool can be used in one of two ways:
Define the place where the clone will be applied, then drag the tool to the source point.
Follow these steps:
- Step 1. Choose the Patch tool from the Toolbar.
- Step 2. Choose the shape and size of the tool in the Options panel, and select Source in Patch's options.
- Step 3. Draw a line with the Patch tool around the part of the image that needs to be restored.
- Step 4. Drag the selected area to a new spot, from which the clone will be created.
Follow these steps:
- Step 1. Choose the Patch tool from the Toolbar.
- Step 2. Choose the tool's size and shape in the Options panel, and in Patch's options select Destination.
- Step 3. Draw a line with the Patch tool around the part of the image that will be cloned.
- Step 4. Drag this area over the part of the image that needs repair.
To use this tool, follow these steps:
- Step 1. Choose the tool from the Toolbar.
- Step 2. Set a pattern, by choosing it from the Pattern Palette in the Options Panel.
- Step 3. Choose the size and shape, blending mode, amount of pattern opacity and other parameters for the tool in the Options Panel.
- Step 4. Press the left mouse button and drag the tool into the image.
The Color Replacement tool replaces one color in an image with another. This tool can be used, for example, to repair the "red eye" effect.
Follow these steps to use the tool:
- Step 1. Choose the tool from the Toolbar.
- Step 2. Set the color which will be used to replace the intended color in the image.
- Step 3. Set the parameters for the tool in the Options Panel, such as: size and shape of the brush, the color's blend mode, color choice mode, opacity, etc.
- Step 4. Click on the color in the image to be replaced.